Introduction
Settings Options
In this topic, we will review the available settings options.
We estimate that this will take 10 minutes to complete.
Detailed Explanation
Once the flight plan has been computed, you can send an ATC flight plan message, a change message, a delay message or a cancellation message to the default ATC filing stations.

![]() Click the Send to ATC button.
Click the Send to ATC button.

![]() Click the Details hyperlink.
Click the Details hyperlink.
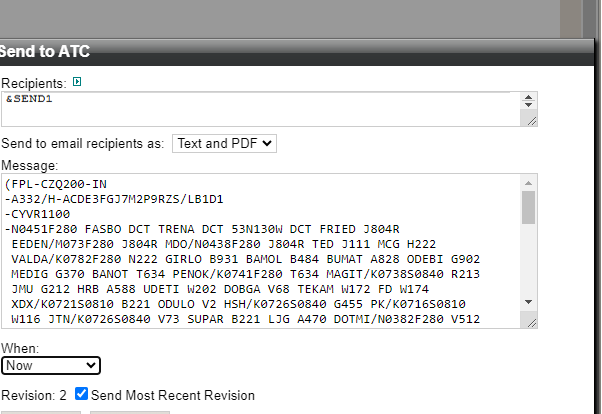
The ATC Confirmation dialog opens after the Send to ATC button is selected. It displays the Flight Plan message, flight change message, flight delay message or flight cancellation message, depending on what is selected at the bottom of the window.
Details: Details Link - Clicking on this link opens the Send to ATC dialog. Add or remove ATC addresses to or from the Recipients field. Modify the message in the Message field as desired.
FPL: Flight Plan - Clicking on this option brings up the Flight Plan message to be sent to ATC recipients as listed in the ATC Confirmation dialog. Add or remove ATC addresses to or from the Recipients field. Modify the message in the Message field as desired.
CHG: Change - Clicking on this option brings up the flight change message to be sent to ATC recipients as listed in the ATC Confirmation dialog. Add or remove ATC addresses to or from the Recipients field. Modify the message in the Message field as desired.
DLA: Delay - Clicking on this option brings up the flight delay message to be sent to ATC recipients as listed in the ATC Confirmation dialog. Add or remove ATC addresses to or from the Recipients field. Modify the message in the Message field as desired.
CNL: Cancellation - Clicking on this option brings up the flight cancellation message to be sent to ATC recipients as listed in the ATC Confirmation dialog. Add or remove ATC addresses to or from the Recipients field. Modify the message in the Message field as desired.
Note: The CNL message pulls the latest computed ETD and not the latest ETD that was filed with ATC.
HINT
If you have the recipients already set, you can click confirm to send the message.

![]() Click the Send to email recipients as: dropdown button.
Click the Send to email recipients as: dropdown button.

![]() Click the Text and PDF list item.
Click the Text and PDF list item.

![]() Click the When: dropdown button.
Click the When: dropdown button.

![]() Click the Now list item.
Click the Now list item.
![]() Click the Send button.
Click the Send button.

![]() Click the Send Flight Package dropdown button.
Click the Send Flight Package dropdown button.

![]() Click the Send Flight Package dropdown button.
Click the Send Flight Package dropdown button.
HINT
The Send Flight Package, Send Flight Plan, Send Weather, Send NOTAMs, and Send Free Text dialogs are all identical in function; only the label at the top changes depending on what you choose to send.

![]() Click the Send Flight Package button.
Click the Send Flight Package button.
![]() Enter &SEND1 into the Recipients field.
Enter &SEND1 into the Recipients field.
Clicking this arrow opens a Use Default Address option. Selecting this option clears the Recipients field.
Recipients: This field shows the default ARINC, SITA, EMAIL, and EMAIL Alias. It can be modified to add, change or remove addresses. After a Flight Package, Flight Plan, Weather Package or NOTAM Package is sent, N-FP remembers the recipients entered, and re-populates the recipients field with these values when the Send Flight Package/Flight/Weather/NOTAMs dialog is opened again. Next to the Recipients label on the Send Flight Package/Flight/Weather/NOTAMs dialog is an information context arrow.

![]() Click the Subject: input field.
Click the Subject: input field.
![]() Enter MESSAGE TITLE into the Subject: field.
Enter MESSAGE TITLE into the Subject: field.

![]() Click the Send button.
Click the Send button.

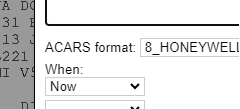
![]() Click the Send ACARS button.
Click the Send ACARS button.
![]() Click the Message input field.
Click the Message input field.
Recipients: This field shows the default ARINC, SITA, EMAIL, and EMAIL Alias. It can be modified to add, change or remove addresses.
Message: Enter message text.
![]() Enter MESSAGE into the Message field.
Enter MESSAGE into the Message field.
![]() Click the Send button.
Click the Send button.
![]()
![]() Click the List menu item.
Click the List menu item.
The green checkmark indicates that the message has been sent successfully.
The icons on the List screen from left to right designate:
- Computed
- Sent to ATC
- Sent Package
- Sent ACARS.