Introduction
NOTAM Filtering
NOTAM Filtering
We estimate that this will take 9 minutes to complete.
Detailed Explanation
NOTAM Filtering
NOTAM Filtering
We estimate that this will take 9 minutes to complete.
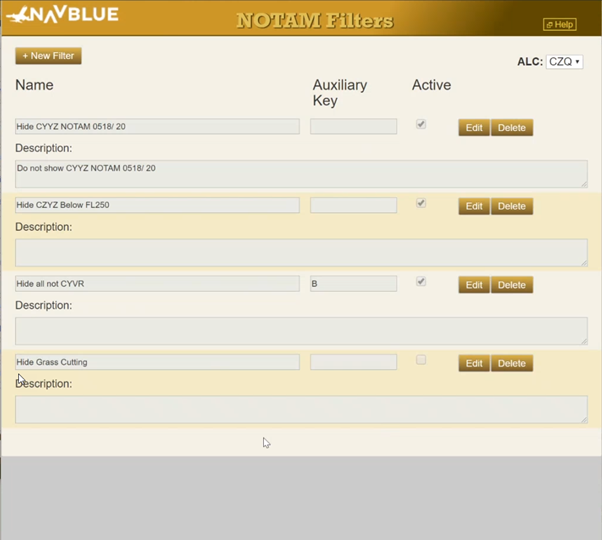
NOTAM Filtering
You can create and manage your own NOTAM filters instead of submitting requests
to Skywise if you want NOTAMs filtered from flight packages.
When using filtering, keep in mind that you are filtering out the NOTAMs you want to exclude from your
reports. Put simply, the logic should be that you are designating the NOTAMS you do not want to see, rather
than those you do.
NOTE: Please note that NOTAM filtering has broad consequences within the N-Flight Planning application and
should not be used lightly. Consequently, users must be assigned an appropriate role in order to access the
functionality. If you do not have the Maintenance or NOTAM filter options available to you, you are likely missing
the appropriate credentials, and must be assigned the correct role before you can use the feature.
To request an appropriate role, please open a ticket with Skywise Support.
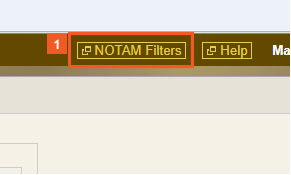
NOTAM Filtering
One of the features of NOTAM filtering is the ability to assign an Auxiliary Key to a given aircraft.
The Auxiliary Key is an optional new data field added through FOMS 220 (Aircraft Characteristics), and offers an
aircraft-level of granularity when filtering NOTAMs.
The Auxiliary Key is an alphanumeric field, and is limited to 20 characters. Within these parameters,
you can create whatever key suits your needs. When you have designated an Auxiliary Key, only aircraft
that have been assigned the key will use the specific NOTAM filters which reference it.
The new key is found in the Maintenance > Aircraft Characteristics page, under the Others tab.
Let's look at how to use NOTAM Filtration, starting from the main screen.

- Detailed Explanation
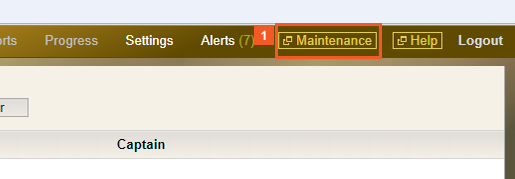
![]() Click the Maintenance hyperlink.
Click the Maintenance hyperlink.
HINT
If you do not see this option, you are lacking an appropriate role. Please open a ticket with Skywise Support to correct this.
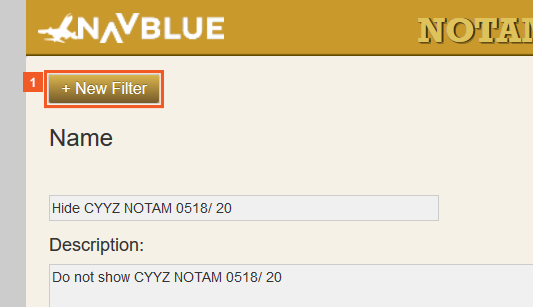
![]() Click the + New Filter button.
Click the + New Filter button.
HINT
If you want to designate an Auxiliary Key, you do so from this option.
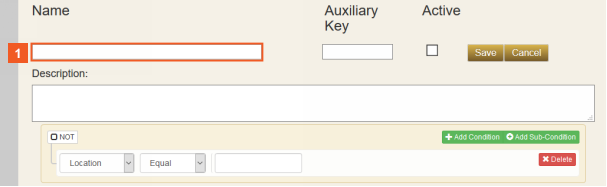
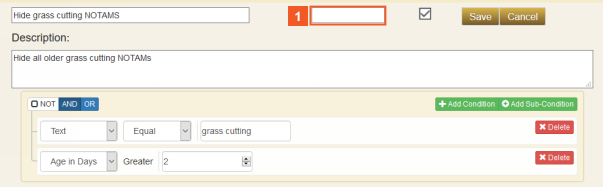
A Name for your filter.
An optional description of what the filter does.
A check box to make the filter active (checked) or leave it inactive (unchecked).
An optional Auxiliary Key to identify which aircraft are impacted.
The logic that comprises the filter.
![]() Click the Name input field.
Click the Name input field.
HINT
A NOTAM filter is comprised of these conditions. Please read each function and the attention pop-up.
ATTENTION
If older filtering logic has been ported over to the NOTAM Filtering feature, you may see some of the special characters that are used to construct the logic of the filter. These may seem unusual, but are valid characters. One such example looks like this:
(^AO)|(^C[DGLMPT])|(^F[BCDGHLOPSTWZ])|(^I[UW])|(^LW)|(^M[ABGHKMNPUW])|(^N[ACFLNOX])|(^O[BL])|(^P[BEK])|(^R[DPR])|(^S[AFOPT])|(^W[DJPRSZ])|(AC$)|(C[MR]$)|(H[JKMNOPUWXZ]$)|(L[ABEFGKLS]$)
While not required, you have the option of using these special characters when crafting your own NOTAM filters. If you want to employ these characters, the meaning of the special characters is:
Character Meaning
--------------------------------------------------------------------
^ Start of string
| OR
[ ] Any of the enclosed characters
$ End of string
( ) Enclosure
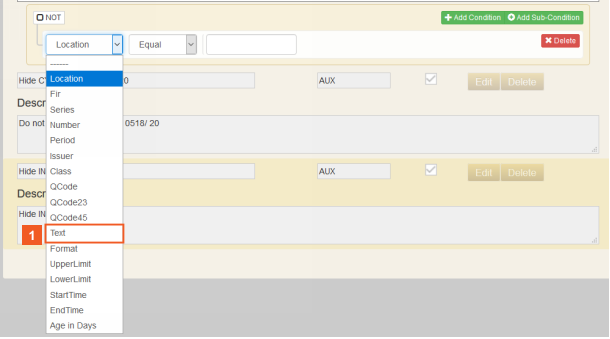
![]() Click the Text list item.
Click the Text list item.
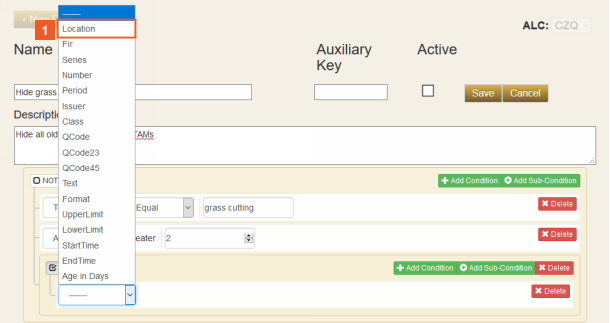
From this list, you can choose the industry standard characteristic of the NOTAM upon which you want to base your filter.
This list is representative of the conditions that are available when constructing your NOTAMs. There are many conditions upon which you can base your filters, and you can add subconditions to each condition, which are then subordinate to the initial condition:
- Location
- Fir
- Series
- Number
- Period
- Issuer
- Class
- Text
- Format
- QCode
- QCode23
- QCode45
- Upper and Lower Limit
- Start and End Time
- Age In Days.
ATTENTION
The operators which can be used on a filter differ based on the filter criteria. For example, the "Location" condition will not allow the "Less or Equal" operator. If an operator cannot be used with the selected filter, a warning message will pop up saying “Unable to save filter representation.”

For this example, we want to match a text string in the NOTAM, so we will leave this option as "Equal", and designate a value in the data field to the right.
![]() Click the Data input field.
Click the Data input field.

We've entered the text string "grass cutting" for you. This is the text the filter will look for in the contents of the NOTAM.
Now, let's add an additional condition.
![]() Click the Add Condition button.
Click the Add Condition button.

![]() Click the Empty (-----) combo box.
Click the Empty (-----) combo box.
When you create additional conditions, you can choose how they relate to the other(s). You can choose if all of the conditions must be met by selecting AND, or you can choose if any condition is met by clicking OR. You can also choose NOT, which filters out anything that does not fit the criteria. For this example, we will accept the default AND value.
HINT
Additional conditions follow the same procedure to create as the one we just completed.

![]() Click the Age in Days list item.
Click the Age in Days list item.

![]() Click the Data spin button.
Click the Data spin button.

![]() Enter 2 into the Data field.
Enter 2 into the Data field.

You can also include Sub-Conditions, that further delineate which NOTAMS to display based upon the filter.
![]() Click the Add Sub-Condition button.
Click the Add Sub-Condition button.
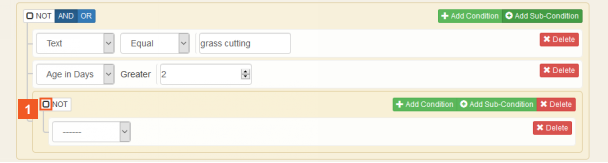
Sub-conditions use the same settings as Conditions.
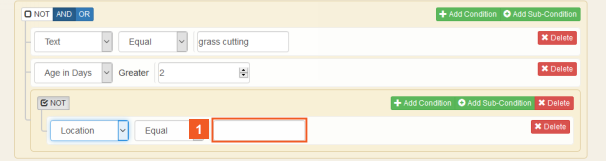
For this condition, let's designate a condition that results in a match when it is NOT true.
![]() Click the NOT check box.
Click the NOT check box.
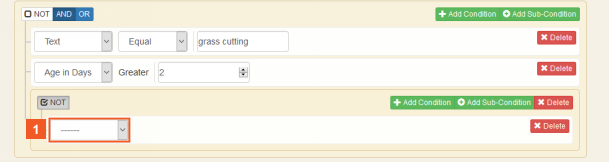
![]() Click the Empty (------) combo box.
Click the Empty (------) combo box.
![]() Click the Location list item.
Click the Location list item.
![]() Click the Data input field.
Click the Data input field.
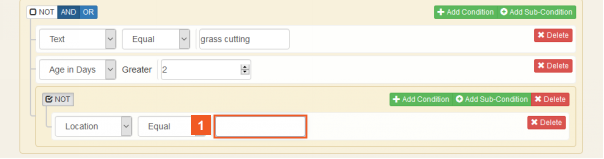
![]() Enter CYYZ into the Data field.
Enter CYYZ into the Data field.
HINT
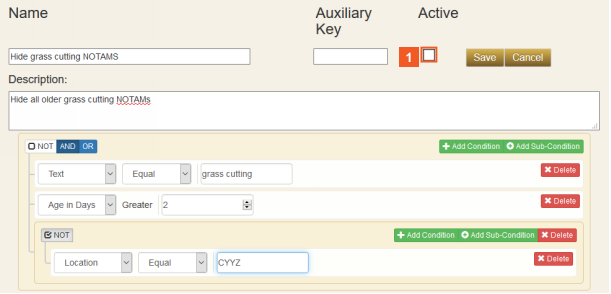
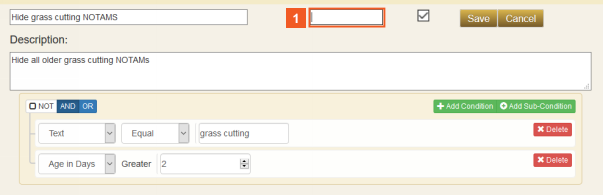
Take a moment to understand the filter we have just created. This filter will prevent any NOTAMs with the folllowing characteristics:
- Where the text includes "grass cutting" AND
- The age of the NOTAM exceeds 2 days BUT NOT
-If the location for the NOTAM is CYYZ (Toronto)
When you are ready, let's enable the filter, and save it to the filter list.
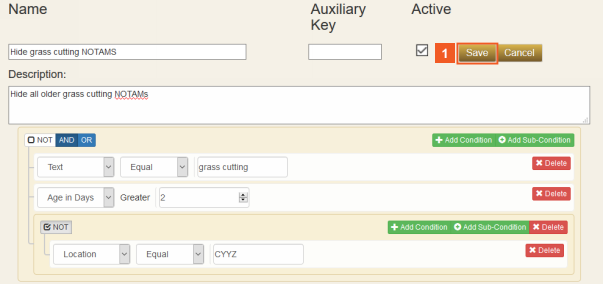
![]() Click the Save button.
Click the Save button.
![]() Click the OK button.
Click the OK button.

Now, let's edit the filter we just created.
![]() Click the Edit button.
Click the Edit button.
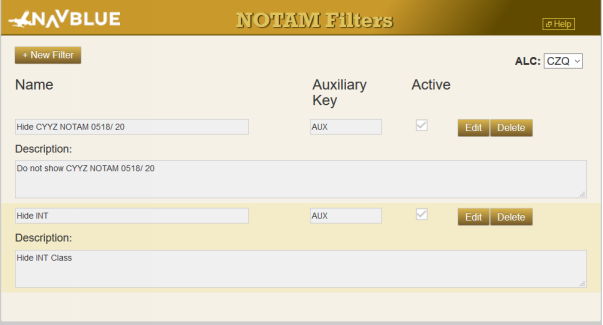
HINT
To keep the interface clean, filters that are not actively being created or edited have their logic settings hidden. You can still see the Name, Description, Auxiliary Key, and Active Status of the filter at a glance.
The logic settings for the filter open. From here, the process to edit is the same as to create.
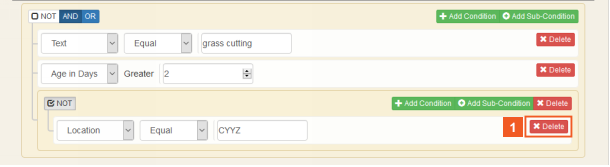
Let's assume we no longer want to see items from CYYZ. We can delete this condition.
![]() Click the bottom Delete button.
Click the bottom Delete button.
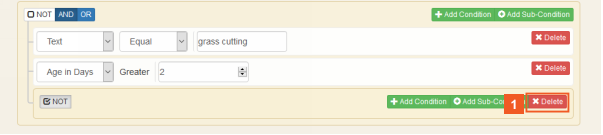
We have deleted the condition, however the condition box remains. If there had been other sub-conditions, they would have been maintained. Since there was only one, we can safely delete the condition as well.
![]() Click the Delete button.
Click the Delete button.
The whole condition is now deleted.
Let's add an Auxiliary Key to this filter.
![]() Click the Auxiliary Key input field.
Click the Auxiliary Key input field.
![]() Enter B into the Auxiliary Key field.
Enter B into the Auxiliary Key field.
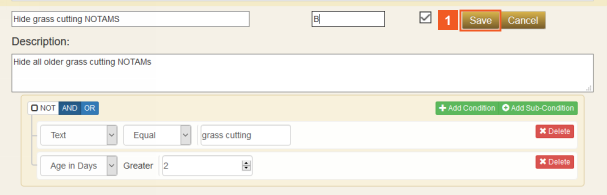
Now only aircraft with the "B" Auxiliary Key will be considered. Let's save the edited filter.
![]() Click the Save button.
Click the Save button.
![]() Click the OK button.
Click the OK button.
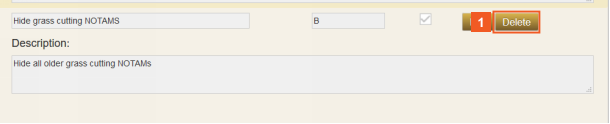
The changes are applied. But let's suppose you no longer want to use the filter. Deleting it is as simple as selecting a filter's respective Delete button.
Let's delete the filter we have been working with.
![]() Click the Delete button.
Click the Delete button.

![]() Click the OK button.
Click the OK button.
The filter is deleted. Now you know how to create, edit, and delete NOTAM filters.