Introduction
Info Panel
This topic shows you how to view information on the interface. You will learn how to query weather, generate custom information, and display flight plans.
We estimate that this will take 6 minutes to complete.
Introduction to the Info Panel
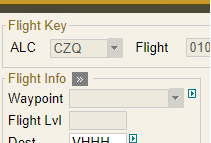
The Info panel is located in the lower left-hand of the screen and displays a variety of information. This topic shows you how to use the interface to display information that is required to plan a flight.
Detailed Explanation
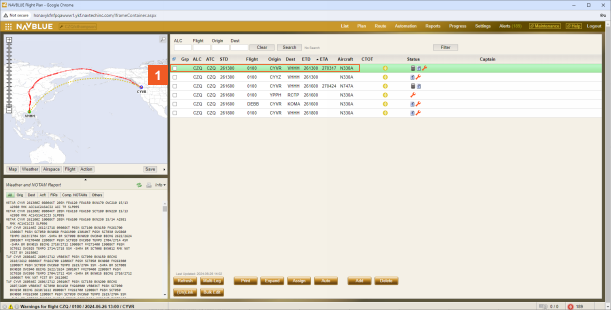
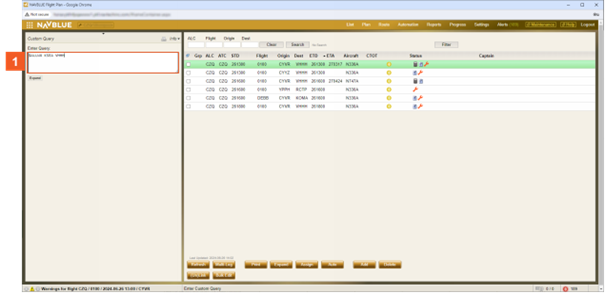
![]() Click the Fight 0100 list item.
Click the Fight 0100 list item.
When you click on a flight weather, NOTAM information is automatically displayed.
![]() Click the
Click the ![]() button below the Action button on the map.
button below the Action button on the map.
Click the arrow to expand the information panel. Click it again to collapse the panel.
![]() Click the Others tab.
Click the Others tab.
The Weather and NOTAM Report allows you to view weather and NOTAMs for all stations, by origin only, by destination only, by FIR, or any of the alternates (including take-off alternate). This is done by selecting the corresponding button at the top of the report.
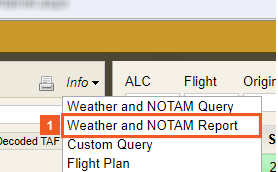
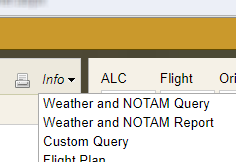
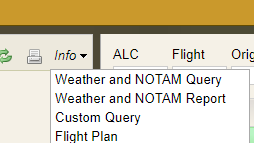
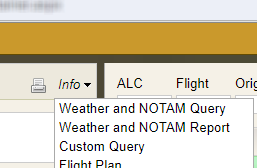
![]() Click the Info dropdown button.
Click the Info dropdown button.
Selecting the Alternate or Others tabs displays a subsection of buttons that allow
you to view weather information for alternates and additional stations.
The Alternates tab subsection displays: All, T/O Alt, 1st Alt, 2nd Alt, 3rd Alt,
4th Alt, Enroute Alt, Reclear Alt and Pt of Safe Return.
The Others tab subsection displays: All, Reclear, ETP, ETOPS, EEP/EXP and Enroute Wx. Information is only available if the stations have been entered in the Plan screen or Enroute Stations webFOMS.
You can print the loaded Weather and NOTAM report by clicking on the Printer icon at the top right of the Information Panel.
You can refresh the Weather and NOTAMs at any time to get current information by clicking on the Refresh icon at the top right of the Information Panel.
Use the Info dropdown button to display different types of information.
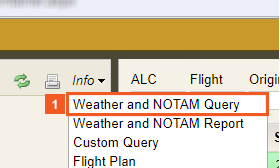
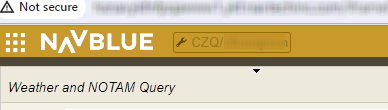
![]() Click the Weather and NOTAM Query list item.
Click the Weather and NOTAM Query list item.
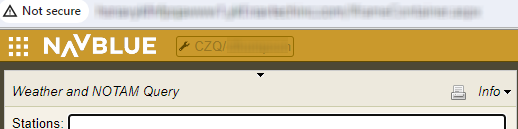
![]() Click the Stations input field.
Click the Stations input field.
Weather and NOTAM Query allows you to retrieve weather and NOTAM information for any station or stations that you enter into the Stations field.
![]() Enter VHHH into the Stations field.
Enter VHHH into the Stations field.
![]() Click the NOTAMs tab.
Click the NOTAMs tab.
![]() Click the Info dropdown button.
Click the Info dropdown button.
You can choose to view METARs, TAFs, domestic and international NOTAMs, company NOTAMS
or weather information. This is done by selecting the corresponding button at the top of the Weather
and NOTAM Query page.
The buttons available vary based on your flight elements (i.e. If a flight doesn't have an ALT, the ALT button will not show in the Weather and NOTAM report, etc.).
![]() Click the Weather and NOTAM Report list item.
Click the Weather and NOTAM Report list item.
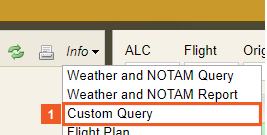
![]() Click the Info dropdown button.
Click the Info dropdown button.
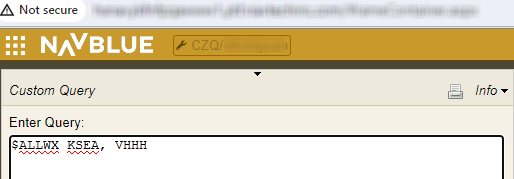
![]() Click the Custom Query input field.
Click the Custom Query input field.
![]() Enter $ALLWX KSEA VHHH into the Enter Query field.
Enter $ALLWX KSEA VHHH into the Enter Query field.
![]() Click the Expand button.
Click the Expand button.
![]() Click the Info dropdown button.
Click the Info dropdown button.
A Custom Query allows you to create a custom weather query.
Select Custom Query from the list and enter your custom query using standard weather query language, e.g.:
- METARs: $SA CYYZ (single) / $SA CYYZ CYYR CYXU (multiple)
- TAFs: $FT CYYZ (single) / $FT CYYZ CYYR CYXU (multiple)
- Domestic NOTAMs: $NO CYYZ or $NO CYYZ CYYR CYXU
- International NOTAMs: $INO CYYZ or $INO CYYZ CYYR CYXU
- FIR NOTAMs: $NO KZBWF or $NO CZYZF CZQMF CZQXF (multiple)
- Requesting several METARs or TAFs for the same station $SA CYYZ N: 4 (4 latest METARs) $FT CYYZ N:6 (6 latest TAFs)
- Trend search - $SA24 / $FT24 CYYZ
- METARs and TAFs for multiple stations - $ALLWX CYYZ, CYHM (must have comma between stations)
- FA - Area forecast query - $help aeraforecasts
- Volcanic Ash - $VOLCANO / $VOLCANOALL
- SIGMETS - Canadian - $IWS _____ (Enter appropriate region)
- CN - ENTIRE CANADIAN SYSTEM
- CWVR - VANCOUVER REGION
- CWWG - MANITOBA REGION
- CYYZ - TORONTO REGION
- CWUL - MONTREAL REGION
- CWHX - MARITIME REGION
- CYQX - NEWFOUNDLAND/LABRADOR
- CYXY - YUKON REGION
- SIGMETS - United States - $WS ____ (Enter appropriate region)
- US - ENTIRE USE SYSTEM
- KSFO - WESTERN USA AND ALASKA
- KSLC - WESTERN USA AND ALASKA
- KDFW - EASTERN / CENTREAL USA
- KCHI - EASTERN / CENTREAL USA
- KMSY - EASTERN / CENTREAL USA
- KBOS - EASTERN / CENTREAL USA
- KMIA - EASTERN / CENTREAL USA
- PANC - ALASKA
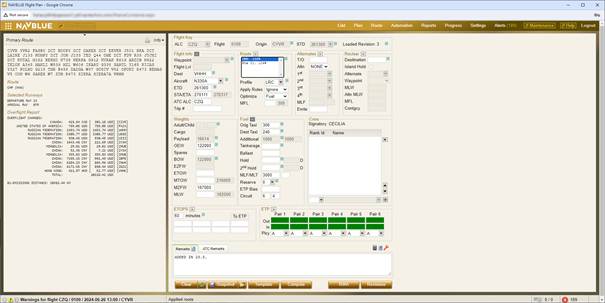
![]() Click the Flight Plan list item.
Click the Flight Plan list item.
![]()
![]() Click the Info dropdown button.
Click the Info dropdown button.
The flight plan must be computed to view it.
![]() Click the Flight Amendments list item.
Click the Flight Amendments list item.

![]() Click the Info dropdown button.
Click the Info dropdown button.
If there are any changes to a flight plan that don't require a recompute, Flight Amendments can be added to the text field shown above.
If the flight package layout has flight amendments in the package contents, flight amendments will show up in the reports tab.
![]() Click the Flight AIRlang Rules list item.
Click the Flight AIRlang Rules list item.
This panel shows the Airlang rules that were followed or broken when the route was created.
![]()
![]() Click the Plan tab.
Click the Plan tab.
![]() Click the
Click the ![]() button beside the Dest field.
button beside the Dest field.
![]() Click the View weather and NOTAMS list item.
Click the View weather and NOTAMS list item.
You can view weather and NOTAMs from the Plan Screen.
![]() Click the
Click the ![]() button beside the Dest field.
button beside the Dest field.
![]() Click the View airport information list item.
Click the View airport information list item.
Destination airport information is displayed.
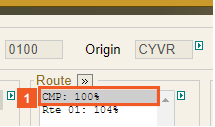
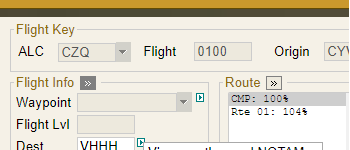
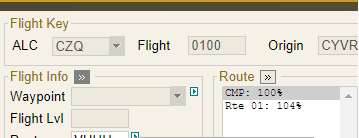
![]() Click the CMP: 100% list item.
Click the CMP: 100% list item.
Click on a route in the route selection box to display associated route information. The route string is displayed in the panel. Below the route string, any available route remarks are displayed.