Introduction
Permit List
In this topic, we will review how to add, remove, and query an overflight or landing permit.
We estimate that this will take 8 minutes to complete.
Add Permits
The Permits screen is used to create, manage, and update permits that are required for a flight to use a country’s airspace. This topic shows you how to add a Permit in the system, and provides you with an overview of the fields and properties available.
Detailed Explanation
![]()
![]() Click the Maintenance menu item.
Click the Maintenance menu item.

![]() Click the Permit List tab.
Click the Permit List tab.
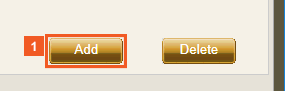
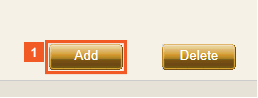
![]() Click the Add button.
Click the Add button.

![]() Click the Country dropdown button.
Click the Country dropdown button.
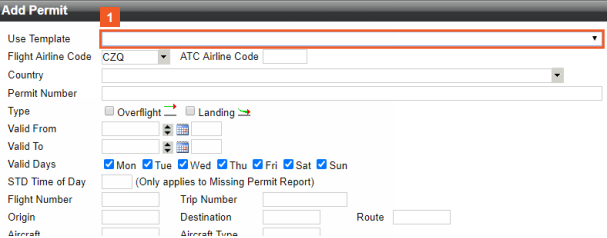
Use Template: This list allows the user to choose a previously-created template to use as a basis for a new permit. All previously-created templates are displayed in the list in alphabetical order. Selecting a template populates other fields in the window based on the template values.
Flight Airline Code: This list allows the user to choose an Airline Code to use when adding a permit. Airlines with multiple ALCs have a list to choose from, while airlines with single ALCs will only have their ALC to choose.
ATC Airline Code: This field allows the user to specify an ATC ALC if it is different than the flight ALC.
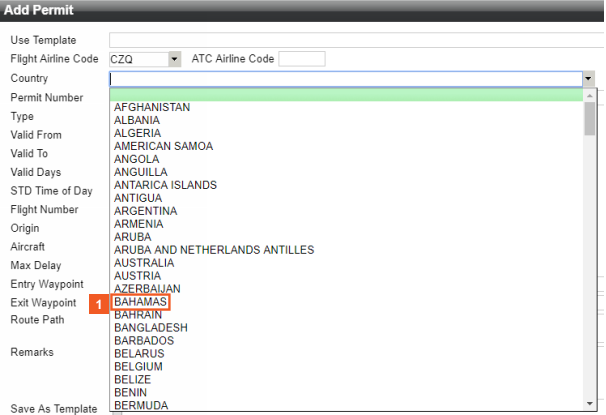
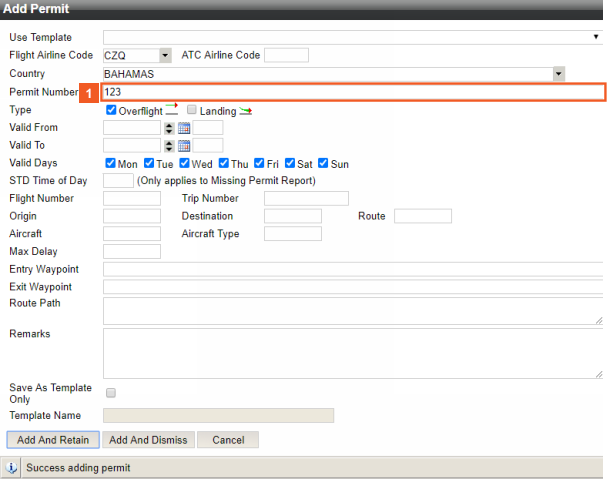
![]() Click the BAHAMAS list item.
Click the BAHAMAS list item.
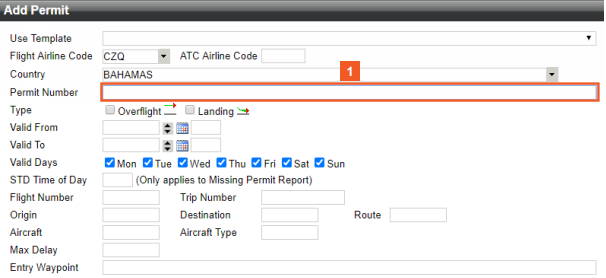
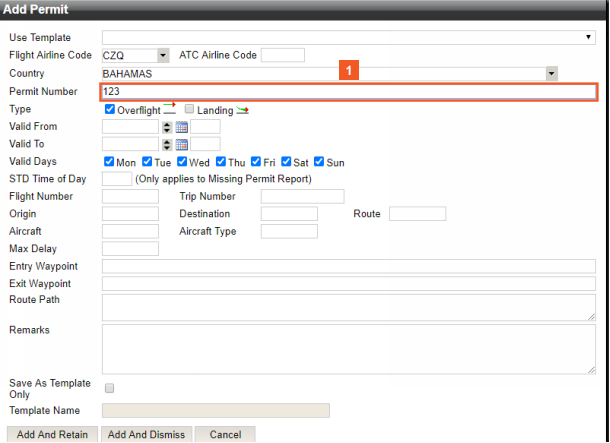
![]() Enter 123 into the Permit Number field.
Enter 123 into the Permit Number field.
Country: Use this list to select the country that requires the permit. This field is mandatory field for permits but optional for templates.
Permit Number: Enter a permit number for the actual permit. It is mandatory field for permits but optional for templates.
Type: Use these checkboxes to select the permit type. The permit type can be overflight, landing, both or none. They are mandatory checkboxes for permits but optional for templates.
When you click in a field or checkbox, you can see more information about it at the bottom of the dialog box.
HINT
Country, Permit Number, and Type are mandatory fields. Please see the descriptions below.
Valid From/To: Use these fields to set the date range for which the permit is valid. Valid From and Valid To Date fields are YYYY-MM-DD format. Valid from and Valid To Time fields are HHMM format.
Valid Days: Use these checkboxes to select the days the permit is valid.
STD Time of Day: Enter the scheduled time of departure. This field is only used when generating a missing permit report.
Origin: Use this field to enter the origin airport ICAO code to apply to the permit or template. This field is optional.
Destination: Use this field to enter the destination airport ICAO code to apply to the permit or template. This field is optional.
Route: Use this field to enter the route number to apply to the permit or template. This field is optional.
Flight Number: Use this field to enter the flight number to apply to the permit or template. This field is optional.
Trip Number: Use this field to enter the trip number to apply the permit.
Aircraft: Use this field to enter the aircraft FIN or registration to apply to the permit or template. This field is optional.
Aircraft Type Listed on Permit - Use this field to enter an aircraft type to apply to the permit. You are not allowed to add an aircraft FIN/registration and Aircraft Type to the same permit.
Max Delay: Use this field to enter the maximum departure delay (in hours). This is maximum number of hours that a flight can be delayed and still have the permit in question be valid. The delay is the ETD minus the STD of the flight, specified as a number of hours.
Entry Waypoint: Use this field to enter the entry waypoint for the permit. The waypoint is validated when you move to another field. The permit is not valid if the route used in the flight does not use the entry waypoint entered. You can add multiple entry waypoints using a comma separated list.
Exit Waypoint: Use this field to enter the exit waypoint for the permit. The waypoint is validated when you move to another field. The permit is not valid if the route used in the flight does not use the exit waypoint entered. You can add multiple exit waypoints using a comma separated list.
Route Path: Use this field to enter a required route path string for the permit to force the MTTA to follow the rules associated with the permits.
Remarks: Use this field to enter general remarks to apply to the permit or template. This field is optional for permits and templates.
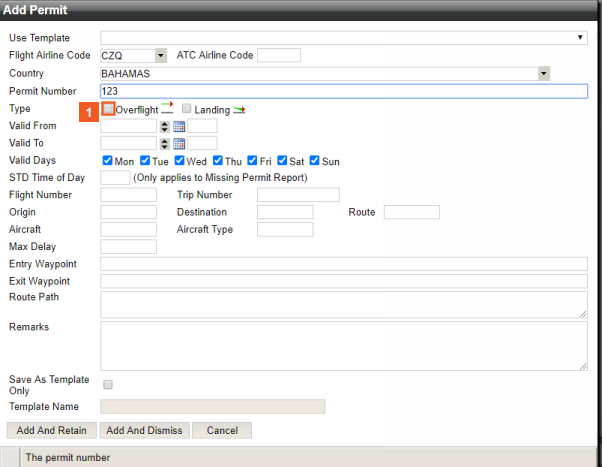
![]() Click the Overflight check box.
Click the Overflight check box.
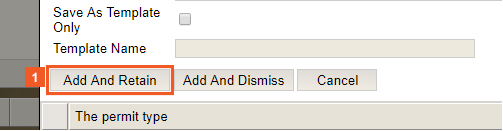
![]() Click the Add And Retain button.
Click the Add And Retain button.
![]() Click the Permit Number input field.
Click the Permit Number input field.
The message at the bottom indicates to you that the permit was added successfully.
Once you have completed the fields, you have two ways to add the permit.
If you select Add and Retain, the permit is added but the Add Permit dialog remains open and all values you entered remain populated. This allows you to add another permit with the same information and add additional information to a new permit. You must enter a new Permit Number.
Add And Dismiss is shown later.
![]() Enter 4 into the Permit Number field.
Enter 4 into the Permit Number field.
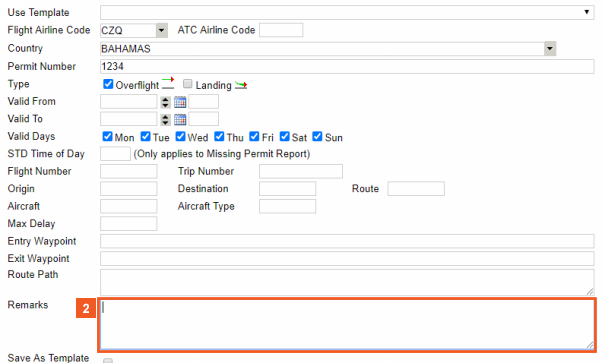
![]() Click the Remarks input field.
Click the Remarks input field.
![]() Enter NEW PERMIT into the Remarks field.
Enter NEW PERMIT into the Remarks field.
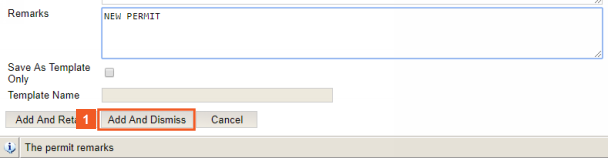
![]() Click the Add And Dismiss button.
Click the Add And Dismiss button.
If you click Add And Dismiss, the permit is added and the Add Permit dialog is closed and you are taken back to the Permit List screen.
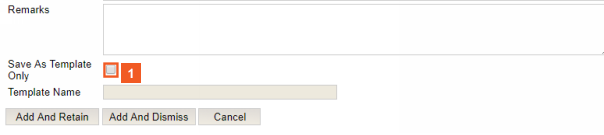
![]() Click the Save As Template Only check box.
Click the Save As Template Only check box.
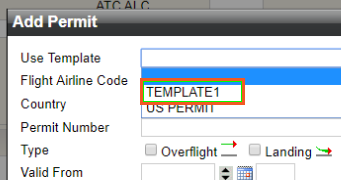
These next steps will show you how to add and apply a permit template. Take note of the fields with information already added. Also note that permit type is not mandatory when creating a template.
When you click the Save As Template Only checkbox, the Use Template field is disabled and the Template Name field is enabled. You must enter a template name to continue.
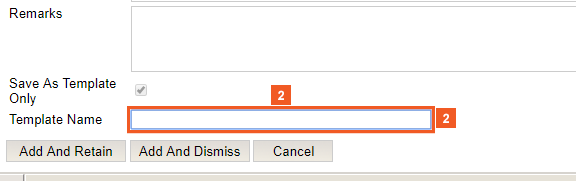
![]() Click the Template Name input field.
Click the Template Name input field.
![]() Enter TEMPLATE1 into the Template Name field.
Enter TEMPLATE1 into the Template Name field.
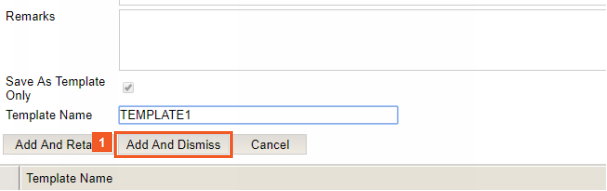
![]() Click the Add And Dismiss button.
Click the Add And Dismiss button.
The options for Add And Retain and Add And Dismiss remain the same when adding a template.
![]() Click the Add button.
Click the Add button.
![]() Click the Use Template dropdown button.
Click the Use Template dropdown button.
![]() Click the TEMPLATE1 list item.
Click the TEMPLATE1 list item.
TEMPLATE1 is the template created in the previous steps.
The template is loaded with the values in the fields selected when creating the template.
The options and functionality remain the same to add a new permit.