Introduction
Automation Functions
In this topic, we will review the Automations functions available in the primary User Interface.
We estimate that this will take 7 minutes to complete.
This module demonstrates the available Automation Functions within N-Flight Planning (NFP) and assumes that the Automation Profiles have already been configured.
The Automation screen allows you to view and edit the automation information for the currently loaded flight. If no flight has been loaded, the Automation screen is disabled.
Detailed Explanation

![]() Click the Automation menu item.
Click the Automation menu item.
Automation can be triggered in many ways. Flights can be configured for automation via Input Defaults, so that the automation will be active as soon as the flight is added to the system.
Flights can also be manually triggered for automation, either individually or multiple flights at a time.
The "Auto" box allows for quick selection of automation.
The "Automation" tab will take you to the Automation Interface.
The Automation Interface allows for selection of automation profiles, Add/Edit/Delete of Automation Events on a flight-by-flight basis, and viewing the status of the various Automation Actions.
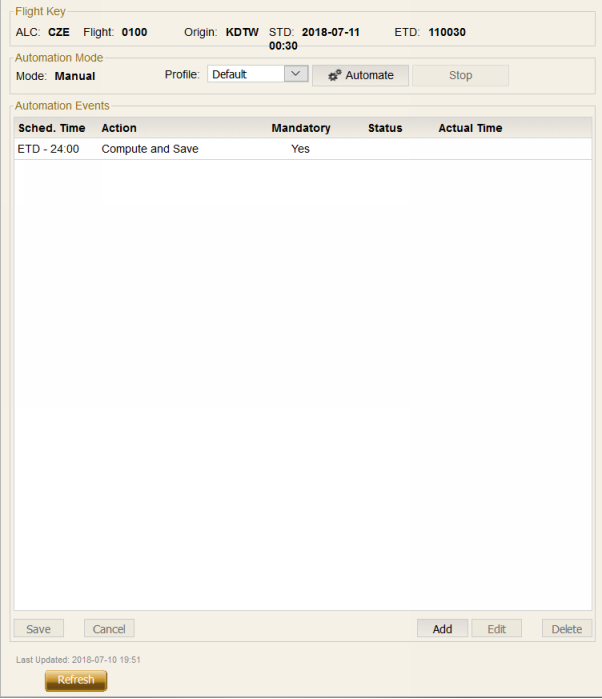
The Flight Key group is display only, and contains the ALC, flight number, origin, scheduled time of departure and estimated time of departure for the selected flight.
The Automation Mode group displays the mode that the flight is currently in. It also contains the Automate and Stop buttons.
Automate: Clicking on this button places the selected flight into Automation mode. The flight will remain in Automation mode until the user places it into Manual mode, or an Automation Exception occurs. When the selected flight is in Automation mode, this button is disabled.
Stop: Clicking on this button places the selected flight into Manual mode. When the selected flight is in Manual mode, this button is disabled.
The Automation Events group. The Automation Events list for the selected flight is displayed in this group.
Events are listed in descending order according to their proximity to the ETD. The user may add, edit or delete events by using the buttons located at the bottom right side of the Automation Events list. For the edit and delete operations, the user must first select an event in the list, by clicking on the corresponding row. The user can also save changes made to Automation Events list, or discard changes without saving using the buttons at the bottom left of the list.
Save: Clicking on this button allows you to save all changes that have been made to the Automation Events list (e.g., added, changed or deleted automation events). As long as there are no unsaved changes to the list, this button is disabled. It becomes enabled as soon as any changes are made to the list.
Cancel: Clicking on this button allows you to discard any changes that have been made to the list since the last save. As long as there are no unsaved changes to the list, this button is disabled. It becomes enabled as soon as any changes are made to the list.
Add: Clicking on this button opens the Add Automation Event dialog.
Edit: Clicking on this button opens the Edit Automation Event dialog. For this button to be enabled, an event must be selected in the Automation Events list.
Delete: Clicking on this button deletes the selected event from the Automation Events list. Events that have already occurred cannot be deleted.
You are only allowed to edit or delete events that are in the pending state.
HINT
You are allowed to add events with the scheduled time in the past. If such an event is marked as Mandatory, it will be scheduled for immediate execution. If the event is optional, it will simply be skipped.
Editing Outdated Data
While you are performing edit operations on the events list, there is a possibility for the system to execute other events. To prevent the data from becoming corrupt, when the user saves changes, the system validates that there were no changes to the automation mode and/or the automation events list while the user was working. If such changes have occurred, the save operation will be rejected and an error message displayed. You must refresh the data, redo the changes and save again.
Saving Changes to the Automation Events List
Each edit operation made to the event list causes the displayed event list to be updated, reflecting the modifications. But, they are not immediately saved to the back-end of the system. This means you can make multiple changes before saving a whole batch at once.
When you click the Save button, all of the changes are sent to the back-end and made operational. Until they have been saved to the back-end, the changes are only seen by you and are not persisted beyond the current session.
Refresh Button
After the data has been loaded on the page, there is a possibility for the system to execute events. In order to obtain the latest data, you must use the Refresh button. Clicking it discards any changes being made and all data on the page will be refreshed (the events list and the automation mode). For convenience, a label showing the time when the data was last refreshed is included above the Refresh button. Clicking the button refreshes the label too. The label is also updated every time a flight is loaded.
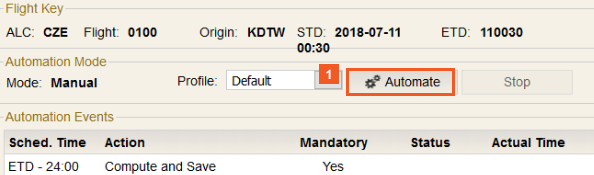
![]() Click the Automate button.
Click the Automate button.
ATTENTION
There is one restriction when adding or editing events. It is not allowed for two events to have the same scheduled time value. If the user tries to add an event having the same scheduled time as an existing one, the operation will fail, the dialog will remain open, the field will turn pink and the following error message will be shown in the message bar: Existing event scheduled for the same time.

![]() Click the List menu item.
Click the List menu item.
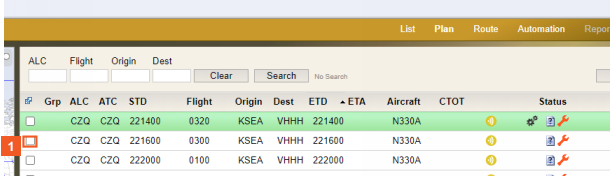
![]() Click the Second CZQ check box.
Click the Second CZQ check box.
Note the Automation Icon, Computation Icon, and RAIM Passed Icon are present, indicating the automation has already occurred and the computation has passed RAIM Check.

![]() Click the Third CZQ check box.
Click the Third CZQ check box.
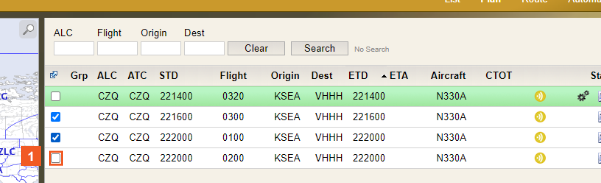
![]() Click the Fourth CZQ check box.
Click the Fourth CZQ check box.

![]() Click the Auto button.
Click the Auto button.
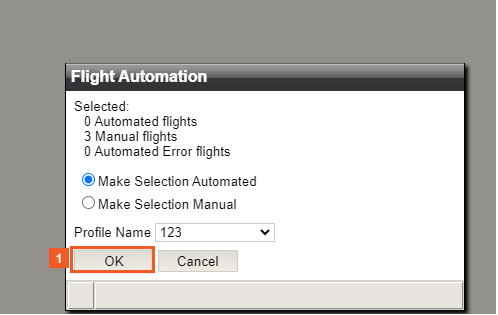
The number of automated, manual and automated error flights that were selected before opening the Flight Automation dialog are displayed. Radio buttons allow automation of the selected flights, or place them in the manual state.
- Clicking OK makes the indicated state change to the flights that are not currently in that state.
- Clicking Cancel closes the Flight Automation dialog with no changes in state for any flights being made.
Note: You can also choose the automation profile, see the Automation Defaults Tab topic for more information on profiles.
![]() Click the OK button.
Click the OK button.

![]() Click the Red Automation Exception button.
Click the Red Automation Exception button.
The Red Automation Icon indicates an Exception which stopped the Automation Process.
ATTENTION
If automation exceptions are a frequent occurrence, your setup may require configuration changes. Contact SKYWISE Support if this is a persistant issue.
When the Automation Icon is selected, the system populates the Automation details in the Info section.
The Exception is highlighted red.
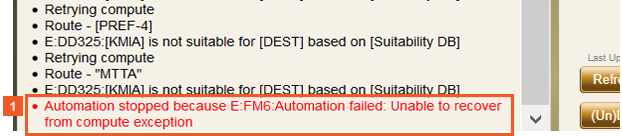
![]() Click the Automation stopped... list item.
Click the Automation stopped... list item.